Home › Forums › General Bike Talk › Bike Maintenance
This topic contains 17 replies, has 0 voices, and was last updated by Bruce Curtis 14 years, 11 months ago.
-
AuthorPosts
-
August 14, 2011 at 1:11 pm #100337
Pulled the piston out of my bike on the weekend. Second time it will be replaced in 170 hours. All proceeded well. There are a few things that are concerning me. The first is some marks in the cylinder. They are on the inlet side of the bore. There are three inlet ports on the back side of the cylinder. The marks extend up in line with the piece of bore that forms the wall between the inlet ports. I’ve tried to get photos to show what I mean but it is a little hard.
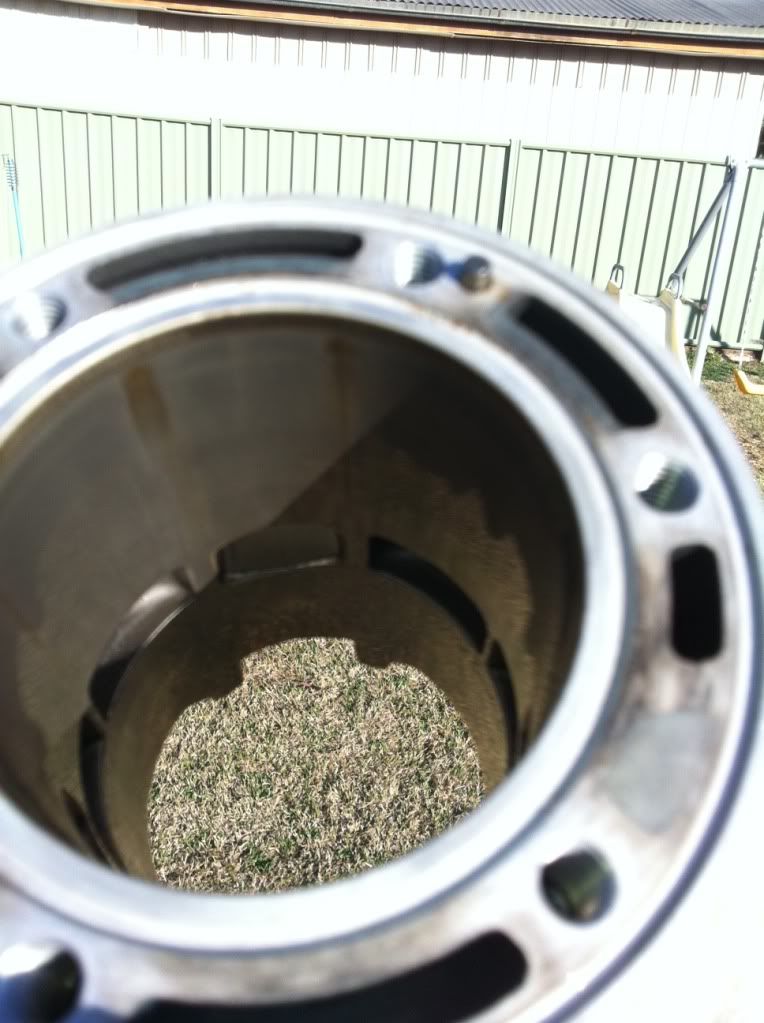
Are these normal/bad? I can still see the cross hatching in the bore where the stains/marks are and it doesn’t feel any different to the rest of the bore.
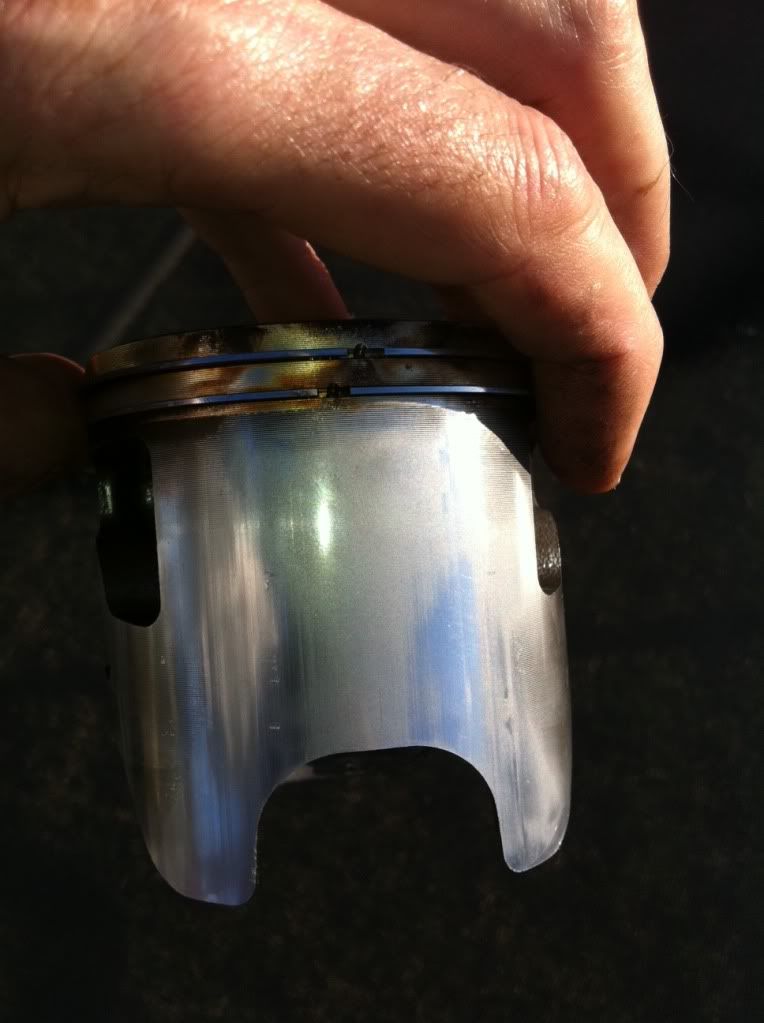
Some more photos of the piston for what it’s worth.
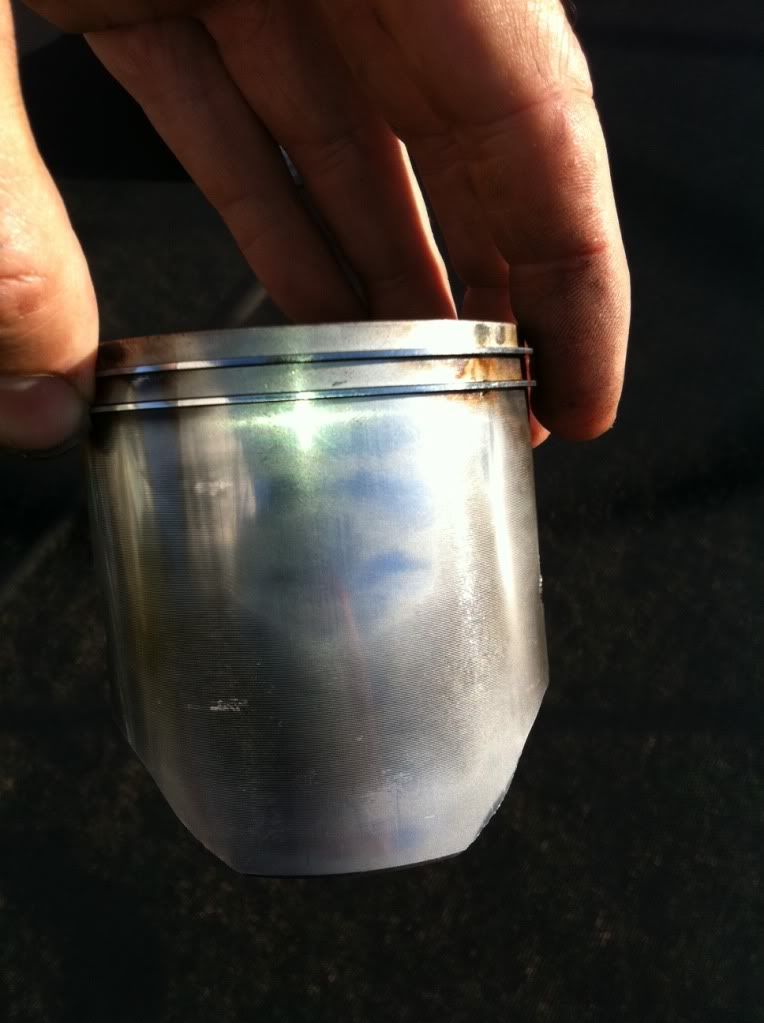
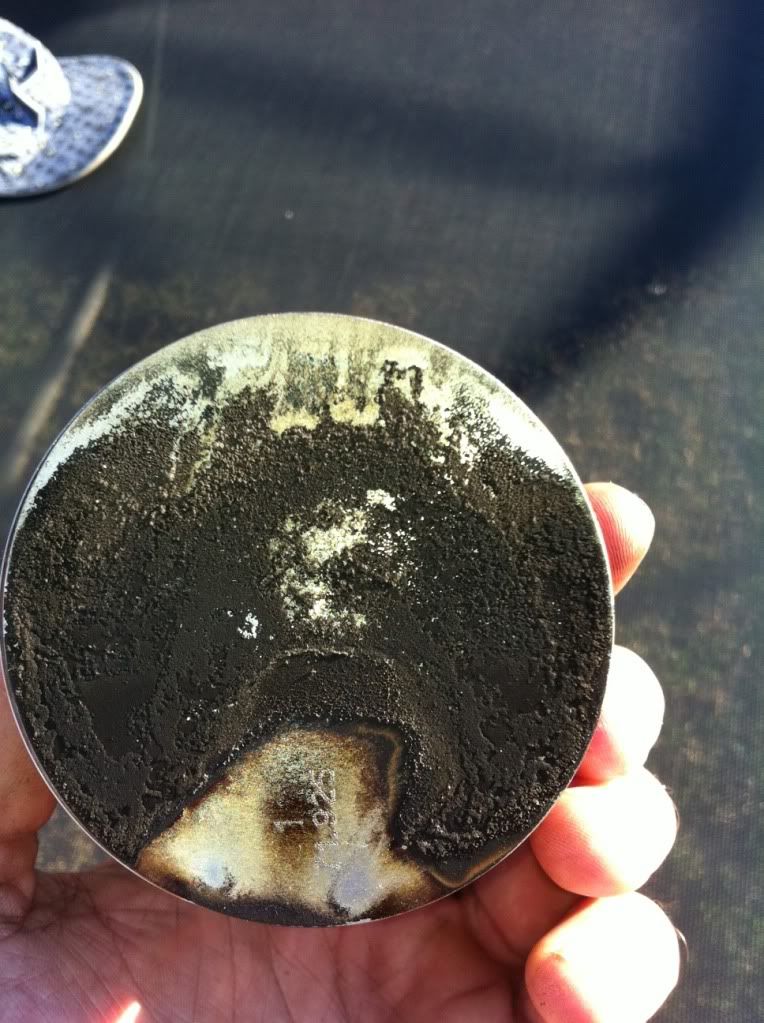
As you can see the piston is a number 1. Should I put in a number 2 after 170 hours. That was how the piston top looked when it came out I haven’t cleaned it up to get the number.
There were two head gaskets. Both are green and one had the number 3820 written on it. How do I know what thickness gaskets to get. I can measure the thickness with verniers if that helps/is accurate enough.
One last thing that concerned me. The gudgeon pin wasn’t tight tight but I had to tap it out with a drift. It wouldn’t just slide out by hand. Is this normal.
Thanks again for all the help.
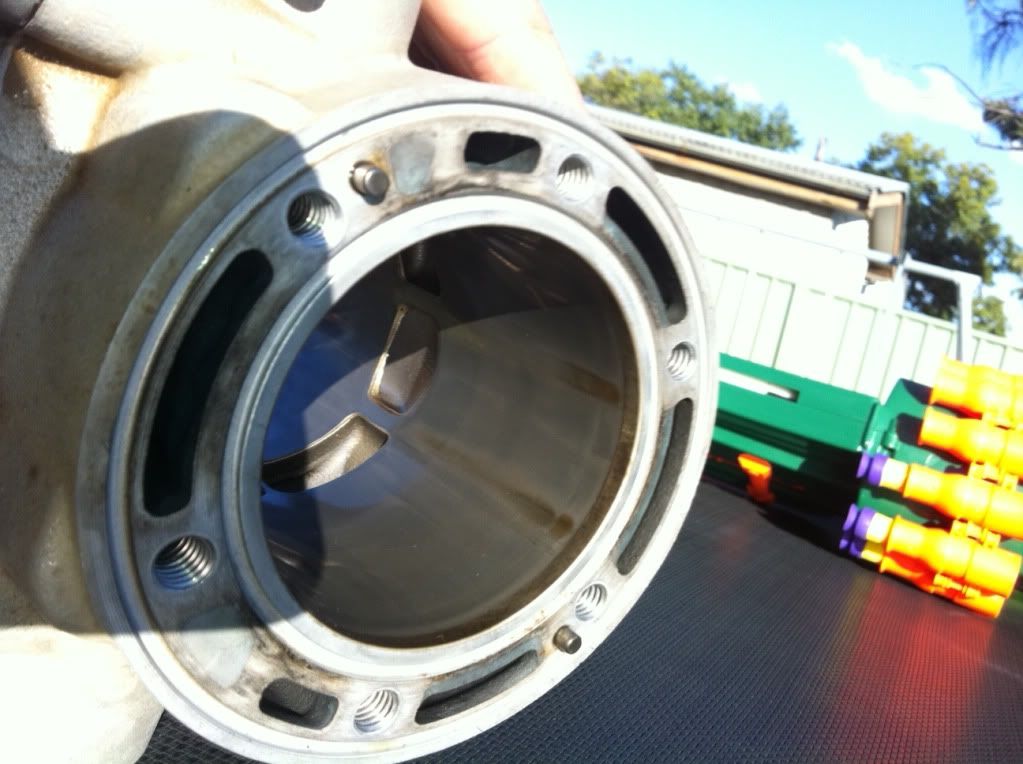
August 14, 2011 at 2:43 pm #207005Just one more thing I forgot to ask. Is it worth cleaning the power valve part that moves up and down above the exhaust hole. It doesn’t look too bad but there is a little soot on there. Seems a little worse on one side than the other too. I gather to clean this you have to take the exhaust flange off the front of the bore.
Thanks
August 14, 2011 at 2:56 pm #207006I cleaned mine, the gasket kit had the Orings for it so replaced them and while I had it apart I thought i may as well tog it up, it was all pretty easy and quick to pull it apart, clean it up and put it back together.
PTW
August 14, 2011 at 3:16 pm #207007Hey Roy sounds like you havent done this before? I thought you did the top end yourself last time. I would suggest you get a copy of the service manual. If noone gives you one pm white rocket he can email you one ( im on holidays). Didnt the spiderman dude on here do a full write up on a 300 rebuild? Search for it. Head uses 2 orings. Base uses one gasket normally. The plastic sleeve they come in show the size. If not use a mic or digi verniers. You choose which size base gasket according to the X dimension (manual). Dont risk guessing or running the same as last time. There is also a technique to measuring X to make sure its right. If it were i i would pull down all the PV parts and oven clean them. This will take some time and you are best to make a guide out of a plastic/wood/metal ruler (or similar) to set Z dimension properly or piston hits PV.
The marks on the bore sound like cold seize marks. You would do well to warm your bike up longer in future. If you cant feel the marks with you fingernail dont worry about them. Get
Scotchbrite pad and run around the bore at the same 45deg angle as the crosshatching. If you cant find SB pads use sandpaper 320 in long strokes. The coating is tough, you wont do damage unless you go nuts in one spot. Wash and blow dry. Always use a new gudgeon pin and roller bearing + clips. I wrote up a tech tip on getting the clips on. Check the carbon reeds while its all apart somone said they chip and break easy. Run a new BR8ES not a 7 KTM are mad. 0.6mm gap from memory. 95 preffered over 98.August 14, 2011 at 3:22 pm #207008Oh and piston I and II are an interesting debate. There is sweet FA difference in size. It wont matter which one you choose as you dont have the right measuring tools (i guess). Choose whats available to you.
August 14, 2011 at 3:26 pm #207017Here is the link to Menaces 300 rebuild thread.
August 14, 2011 at 7:16 pm #207009Thanks Axel and Mick. I’d had a look at that thread before anyway. The only trick I found that wasn’t mentioned in there was getting the clip off the power valve actuator but luckily I googled ktm piston removal (before I started anything) and there was a clip on youtube about it. I probably wouldn’t have even noticed the clip. As with a lot of things it’s very easy when you know how.
And yes, this is my first crack at piston removal since I did it on the dt 175 when I was in early high school. Probably didn’t do it right then and certainly wasn’t too stressed about it either at the time. Different story now though.
Have ordered all the bits. Am a little concerned about pulling the power valve apart. I have pm’d White Rocket so hopefully he will come through with the service manual. I only have the owners manual and it gives me the measurements but doesn’t tell me how to do it.
I notice on the spare parts manual there is no gasket between the exhaust flange and the bore. It looks to me like they did use some sort of sealant in there though on mine.
When I take the exhaust flange off does the power valve then just pull out or do I have to undo all the mechanisms on each end. This z dimension worries me. How is this adjusted to ensure I get it put back in the right place.
Whilst on the topic of measuring. It says in the manual that dimension x is 0+-0.1mm. What is afore mentioned technique of getting this right. I have a torque wrench and vernier calipers. I have measured the gaskets taken out. They are 0.4 and 0.2. It looked to me that the piston was below the top of the bore. I have ordered a 0.2, 0.4 and 0.5. My plan of attack is to put in the 0.5, torque up the base nuts and then measure. If the piston sticks out then go back to what I had with 0.4 and 0.2.
Sorry for all the questions but I like to head into things with at least a basic understanding of what I’m doing rather then breaking something because I was unprepared. If push comes to shove I’ll get my neighbour in, he’s a qualified mechanic but I’d rather try myself if possible.
August 14, 2011 at 7:52 pm #207031Hey Roy, the pistonwash (clean area) on the crown is very small, but I digress that is not what we are here for.
First thing to check I’d ask you to make is those suspicious looking marks at 5 and 7 o’clock in the bore (intake side less of a worry.. but never can be too careful) can you feel them with the fingernail test and eyes closed?
August 14, 2011 at 7:53 pm #207032Hi
The marks on your bore and piston are caused by blow by. The compresson gases are getting past your rings on the power stroke and this is making the stain on your bore and piston. Getting the measurements right for you piston is important. Also you really need to get hold of the workshop manual and get your base gaskets thickness right. 0.2 of a mm can change the compression ratio of your machine a lot. Get it right the first time and it will run a lot better and last a lot longer.
Hope this helps
RobertAugust 14, 2011 at 8:16 pm #207035Sorry forgot to mention that to measure your piston on the bottom of the skirt then measure your bore to get your overall piston clearence. Even the no1 piston you installed last time may have to bigger clearance. This is a good place to start.
Cheers
RobertAugust 14, 2011 at 8:35 pm #207039Thanks for the replys. After Axels post this morning I went back and did the fingernail test on the marks/stains. Couldn’t feel anything which made that awful knot I’ve had in my stomach for the past 24 hours recede a little.
When measuring the bore. I assume I do that at the top. I will measure both ends anyway and see if they are different.
Why measure at the bottom of the skirt. Are pistons bigger at the bottom.
August 14, 2011 at 8:46 pm #207040Hi Roy
The wear marks are from the small bridges between ports wearing out first as they have less surface area ,put a piston in my old ktm 200,it looked the same,sold it,and it went for a little while,then died.would recomend looking at bore recoat for piece of mind.Try putting a straight edgefrom top to bottom and see if there is any wear on that area.
Think from memory my 200 had rubber orings on the pipe were it fits inside barrel,but still needed hi temp silicon to seal itAugust 14, 2011 at 9:08 pm #207046Hi
The skirt of the piston is where you get your piston to bore clearence from. Check the manual for the correct clearence. Another thing to check is your ring end gap. Take the rings off the piston sit it in your cylinder and push it down with the piston about 20mm measure the end gap of your rings then. I think you will find on your old rings this measurement will be bigger then it should be. This will also confirm blow by. If your no1 piston was not big enough when you fitted it this will put extra force on the rings and wear them out a lot quicker.August 14, 2011 at 9:43 pm #207010Looks like some progress here.
I didnt look at your pics Roy but whatever the marks are dont sweat it. Yes the bridges do cop the most wear but unless you seized it really really bad (you didnt) i would move on. Good point about ring gap. KTM does not specify the min ring gap! See if one of these knowledgable peers here can tell you the min gap fot 2st 300cc ring. I cant remember off the top of my head. Wiseco writes it on the install guide. To file the ring gap you draw the file through the gap from the centre outward NOT up and down. Measure the ring 10mm+ from top lip of bore. Read that manual off Rocket first before we repeat it word for word, then we can help further. Its good stuff. One tip with X is your straight edge/rule can be positioned across the top of bore, use the rear wheel to rock the piston on its TDC. Use less gasket until piston stops ta tap tapping on the rule. My last rebuild required .4 + .2 = 0.6
As for the exh flange i only use copper gasket maker there to form a gasket. Follow its instruction. Supershit Auto had a special on that range last week. Theres black blue and copper. Copper is for highest temp. I also clean out the exp chamber “port” and cure a thin layer of this stuff to help the exp chamber orings seal and so it doesnt flog out so easily.August 14, 2011 at 9:55 pm #207047if anyone wants one i got a ktm 300-250 and a ktm530-450 workshop manual
-
AuthorPosts
You must be logged in to reply to this topic.