Home › Forums › Bike Preparation Tips › Bike Preparation Tips › Fork Feeler gauge
This topic contains 19 replies, has 0 voices, and was last updated by Greg 15 years, 11 months ago.
-
AuthorPosts
-
May 10, 2010 at 2:05 am #98434
Hey Bulls
Can someone give me the low down on how to make your own fork feeler gauge. I think I picked up some grit on the Soafala ride.
Justo mentioned it to me but it was during a rest in one of the rocky sections and my brain was still vibrating in my head. He mentioned a coke bottle but what shape do I cut it into and is it as simple as sliding it up insdie and giving it one full rotation.Cheers
STM
May 10, 2010 at 2:12 am #178593Hey Scott I see sutto’s have them for sale little packs they seem cheap, I will pick one up and mail it to you if you wish. Once you have the shape etc you could make some and match a material as such
TB
May 10, 2010 at 2:20 am #178599Cheers TB
That would be great. I will PM you my address and if you PM your banking details I will sort out the payment.
Thanks
STM
May 10, 2010 at 2:24 am #178601No payment required for you kind sir. You can do a editorial on it maybe a video etc
TB
May 10, 2010 at 5:35 am #178606I will do whatever OBT requires of me :laugh:
Cheers
STM
July 22, 2010 at 9:16 am #178632Well STM I sent to fork cleaners where is the write up?? :laugh: :laugh:
Here is something I found elsewhere, I reckon your write and pictures will be heaps better :laugh:
Before you throw your precious cash and time into fitting new seals, you may find there’s simply some dirt caught in the seal. Try grabbing a tearoff and cutting it into a hook shape, then simply slide it under the seal and drag it around.

(Thanks to ADB)
TB :laugh:
July 22, 2010 at 10:21 am #178594Have tried this few times, but found it worked better if i took out the offending forktube and did it upside down.
no luck last time though but it slowed the leak a bit.July 22, 2010 at 10:44 am #184414Guilty as charged. I owe a write up. I will put it together over the weekend.
STM
July 22, 2010 at 10:51 am #184415twobanger wrote:
Quote:Have tried this few times, but found it worked better if i took out the offending forktube and did it upside down.
no luck last time though but it slowed the leak a bit.If I went to the trouble of removing the fork, I’d just replace the seal. Not real hard as I found out.
http://www.obtrailriders.com/index.php?option=com_kunena&Itemid=56&func=view&catid=65&id=76559
July 22, 2010 at 11:22 am #184416have used a ballards fork feeler gauge not much different to a normal feeler gauge be interesting to see how a tare off goes
July 22, 2010 at 11:37 am #184424white rocket wrote:
Quote:have used a ballards fork feeler gauge not much different to a normal feeler gauge be interesting to see how a tare off goesWait till you see the tool STM has its a ripper
July 22, 2010 at 12:12 pm #184417RipnShred wrote:
Quote:twobanger wrote:Quote:Have tried this few times, but found it worked better if i took out the offending forktube and did it upside down.
no luck last time though but it slowed the leak a bit.If I went to the trouble of removing the fork, I’d just replace the seal. Not real hard as I found out.
http://www.obtrailriders.com/index.php?option=com_kunena&Itemid=56&func=view&catid=65&id=76559
Yep easy as to do the seals but didn’t have any on the shelf, hadn’t riden in a while and just notice a leak the night before your going riding gotta give it a crack.
July 24, 2010 at 12:25 pm #184434Disclaimer: I am by no means an expert on dirt bike maintenance. I did ask how to do this job and not only got directions but supplied with the gauges (thanks TB). I thought there may be others with the same question who have not used them before so to all those people, this is for you.
Leaking USD forks are not uncommon as the weight of the oil is constantly bearing down on the seals. Seals should be changed regularly as part of your maintenance regime but not all leaks mean that your seals are shot. Often it is just a bit of grit that is caught between the seals and the fork stanchion that is causing the leak. If you don’t remove this it will not only leak slowly but lead to premature seal wear and can also score your precious inner leg which is something you want to avoid at all cost.
This job can be done with the fork installed but I am going to remove the leg so that I can give everything a good clean without rolling around on the garage floor.
Start with a clean bike and remove front wheel.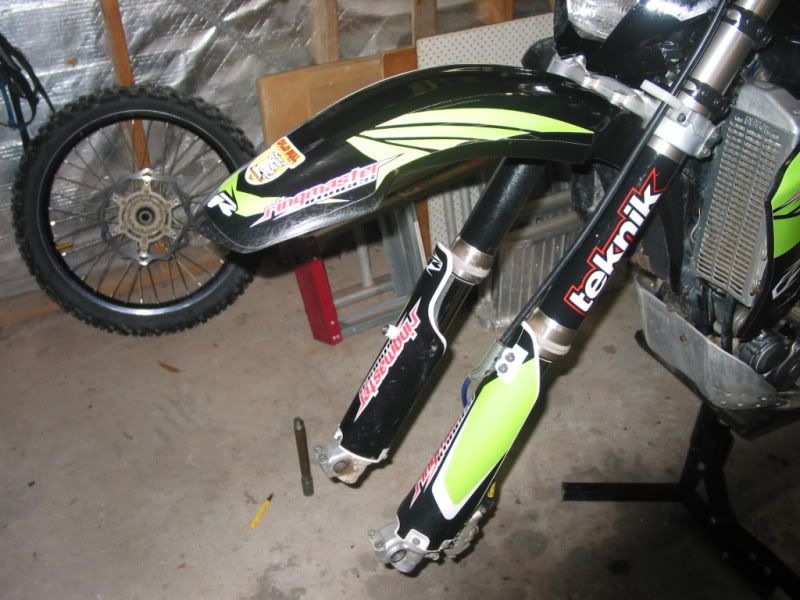
Remove any brake or speedo cables running down the fork leg and then loosen all crown bolts. If the fork leg does not slide out easily then lever the crown gently with a flat head and slide it out.

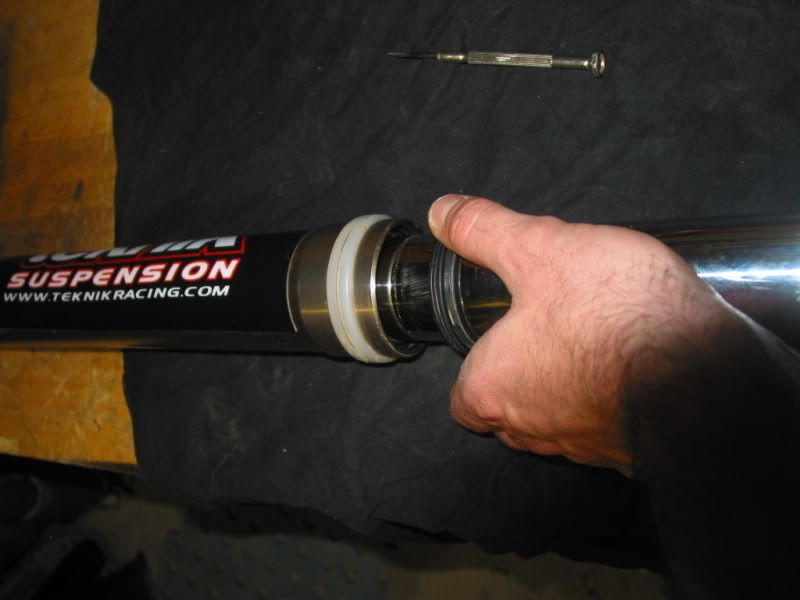
Give the fork leg a good clean and lay on the bench. First thing you have to remove is the dust seal. Roll out the wire o ring
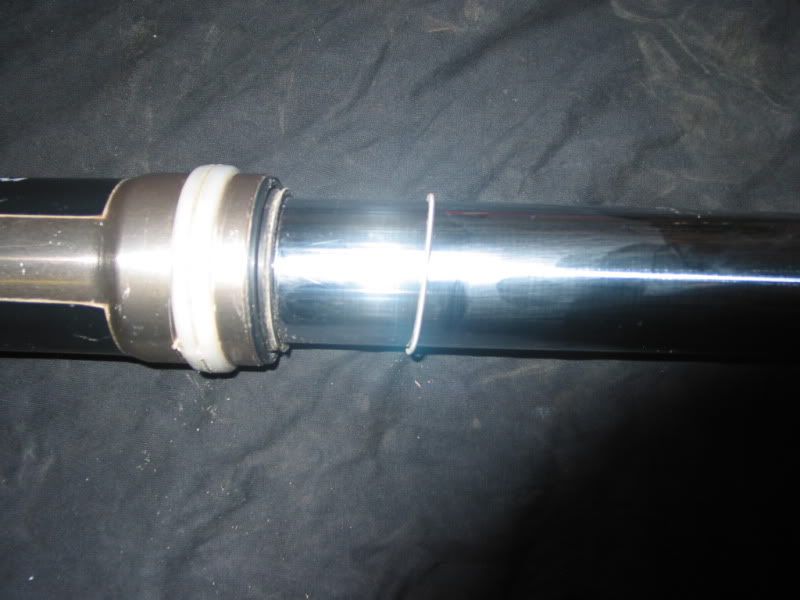
and gently lift the dust seal with a small flat head. Keep a steady hand and work your way around slowly as you do not want to slip and scratch the inner leg. Once this is removed slide it down and out of the way.
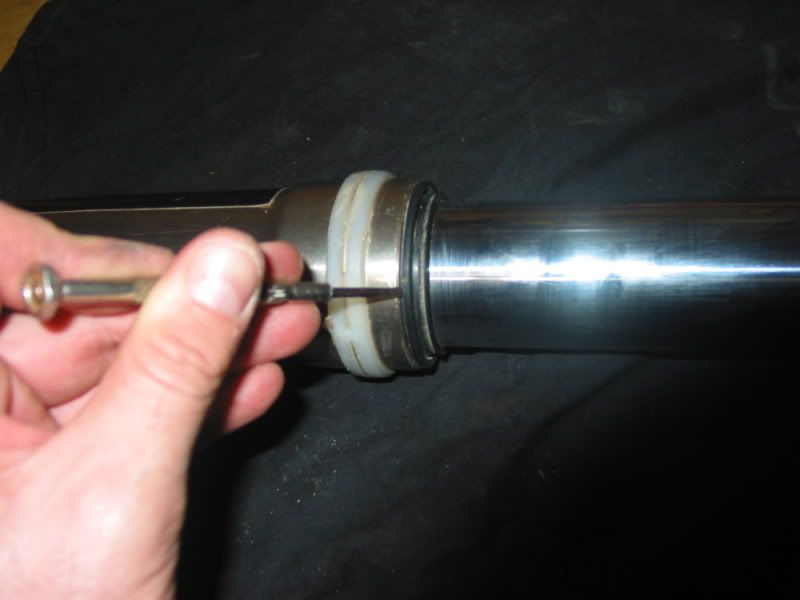
Next is the oil seal circlip. Using a small flathead squeeze it toward the leg and it will lift away from the oil seal
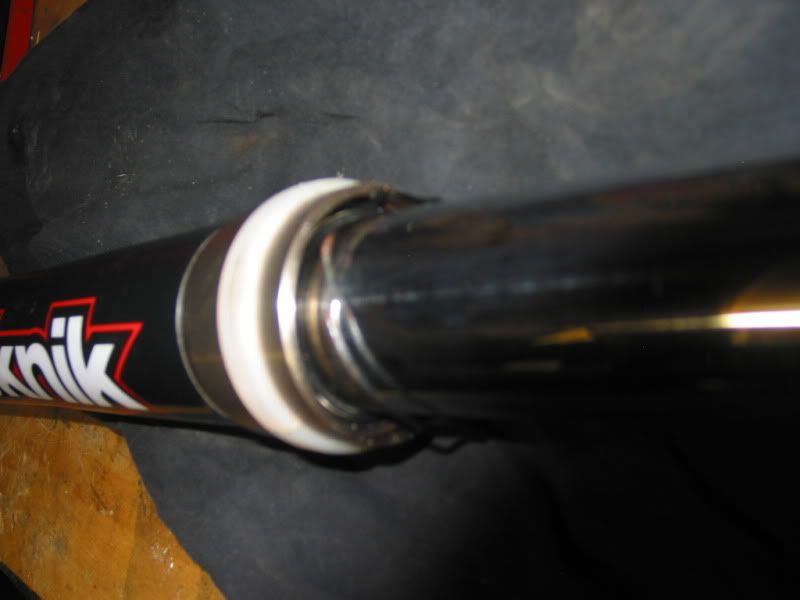
Again, be careful to let this make its way gently down the fork to avoid scratching
Now is another chance to give thing a good clean but give the brake cleaner a rest here. You don’t want something that harsh on the oil seal. Just use a moist cotton bud and give it a good reaming.
Now it is time to get the feeler gauge out and get rid of the culprit.
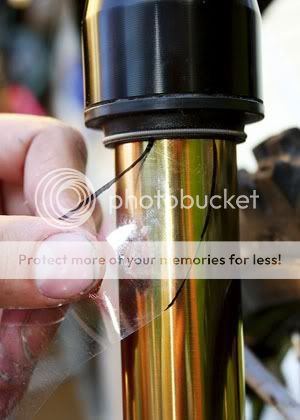
Hold the gauge beside the fork leg and use the hook end as the leading edge. Inset the gauge in a circular motion and progressively sink it deeper into the fork.
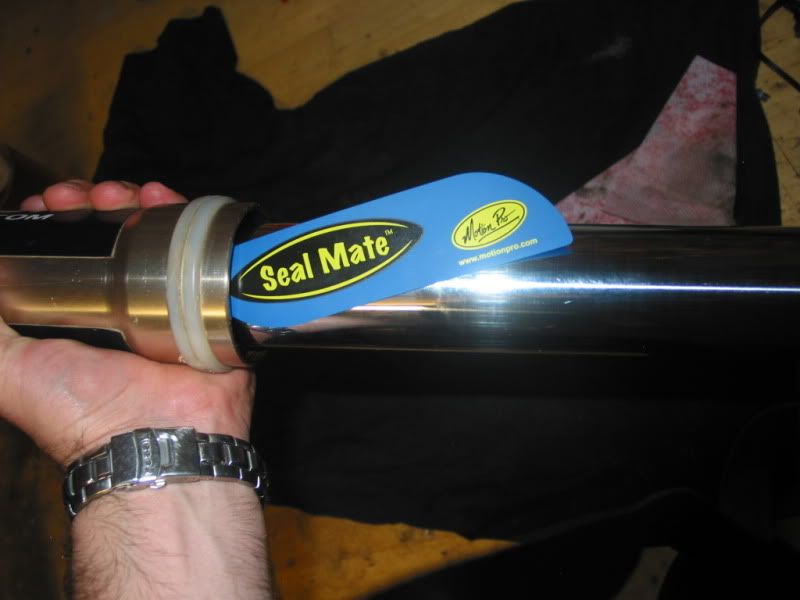
Once you are in about an inch the keep rotating and slowly remove the tool as you do. Keep things progressive here as you don’t want to damage the inner lip of the seal.
You can now compress the leg to see if you have stopped the leak. If not try again and if it still leaks then you need seals. At least it is out of your bike and the job is a bit easier. Hopefully though, you have stemmed the flow and the job is done.
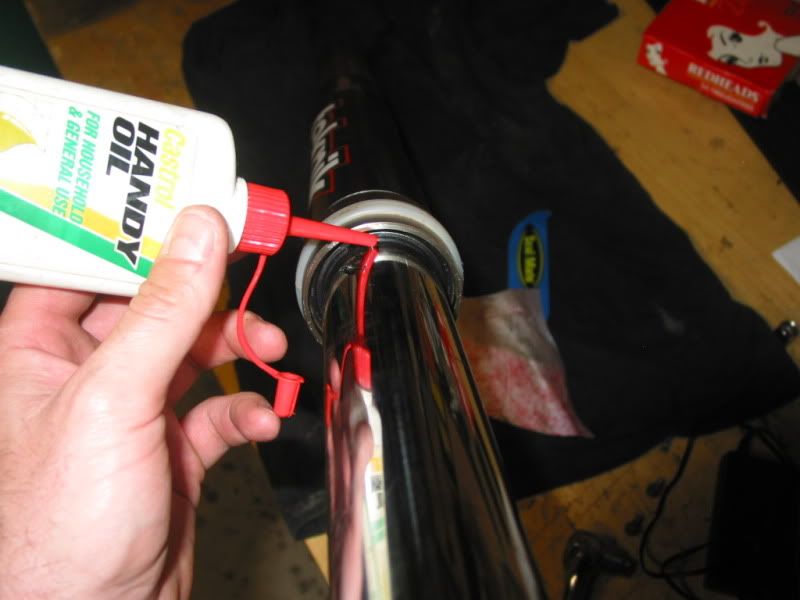
Time to reassemble and reinstall. Before refitting the oil seal cir clip and add a bit of lightweight oil around the inner leg. This will help lube the inner leg when you give it a few pumps and help reduce stiction.
Replace circlip and check that it is sitting flush inside the outer and not rubbing on the inner. Replace dust seal, o ring and you are done. Give it a few more pumps on the floor to lube the shaft, clean and you are ready to reinstall into the fork crowns. Make sure you rotate as you tighten these bolts as the will strip if you over torque them. This is the point were you would rather a leaking seal so be careful.
When it comes time to replacing the front wheel you want to make sure you don’t bind the fork. This occurs when the axle is done up with offset lowers and makes the forks work against each other rather than together. To avoid this start by tightening the axle with no weight on the front wheel. Once you have the correct torque put the front wheel on the ground and compress the fork a few times and whilst it has weight on it do up the pinch bolts. You should do this with the bike as upright as possible so that the pinch bolts tighten flush.Drink more beer
")
STM
July 24, 2010 at 9:19 pm #184606absolutly top tech hints there STM, I know I can do one part of that job 😆
July 24, 2010 at 10:26 pm #18461110 outa 10 Scott, you da man excellent write up mate
TB
-
AuthorPosts
You must be logged in to reply to this topic.