Home › Forums › Do It Yourself Videos, Photo Posts Helpful Hints › Do It Yourself Videos, Photo Posts Helpful Hints › DR400 Cylinder head removal, a D.I.Y for everyone
This topic contains 19 replies, has 0 voices, and was last updated by Greg 14 years, 7 months ago.
-
AuthorPosts
-
April 28, 2011 at 11:31 pm #99827
I thought as I was going to pull the head off Fish’s DR400 I may as well do a DIY to help others if they want to have a go
Fish’s bike wouldn’t start on the morning of day 5 of the recent 3 state ride. Not starting cold is a common theme with closed inlet valves. Recently Krusty’s DR did the same thing on the Nabiac museum ride he trailered his bike home to avoid the hassle of roll starting. Fish roll started his bike and did another 3 days and more than 1000kms after the failed cold start. Because the inlet valves don’t close thus sealing the combustion chamber the air / fuel mixture that should be compressed and then fired gets blown back up the inlet towards the carby. When you tow start the engine you wind it over at a faster pace then the starter motor helping build compression because of the extra speed this normally helps start the engine.
I had to go to Hornsby the other night so I picked up Fish’s bike and this arvo I removed the cylinder head
Here is a blow by blow
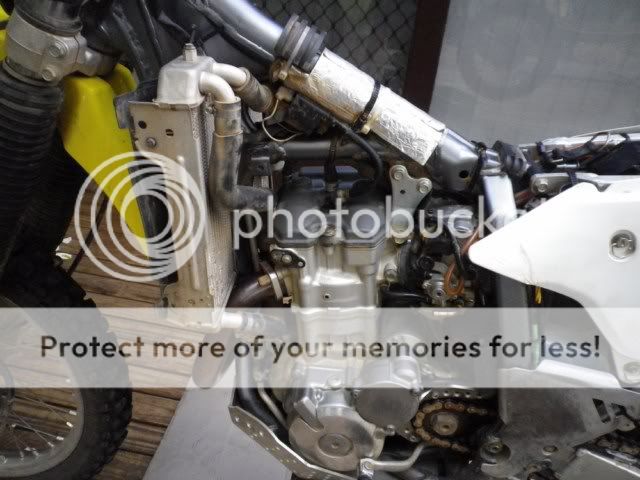
First the bike in question


Up on the lift stand

The seat was removed, two bolts at the back of the seat
Then the tank needs to come off, two bolts through the air vents for the front mounts

The rear of the tank is held on by the rubber strap

The fuel line in pulled on the tap, remember to turn the tap off

So the tank and seat removed give a cleaner work area


The coolant needs to be drained, I drained it here at the water pump inlet

Coolant drained

The other hoses need to be removed as well

Including the 90 degree neck at the front of the cylinder head, two 8mm headed bolts


Next the exhaust system complete needs to be removed

Inside bolt needs a long 6mm Allen key

The whole system needs to come off

Once off makes access easier


Now the front of the cylinder head is all clear

Top engine mount was next

The horn so the tappet cover bolts could be accessed and the tappet cover removed

The hose clamp from the carby to the cylinder head was loosened


The breather and oil return hoses on the top of the tappet cover were taken off


Then the tappet cover itself
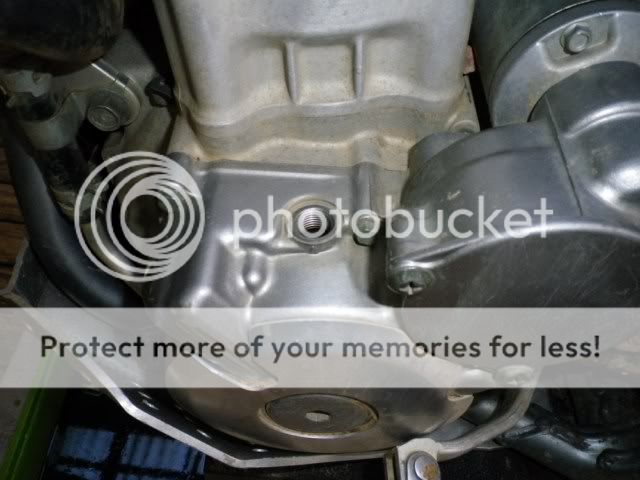
I thought it best to double check it actually had closed valves. The engine needs to be setup on TDC (top dead centre) there is a mark in the left hand side crankcase

There is a mark / line on the flywheel see here in the timing hole, I wound the engine over in 5th gear via the rear wheel

To confirm all was right the marks / lines on the cam gears should line up with the head
Inlet cam

Exhaust cam

Cams and marks / lines

Now I checked the clearance between the buckets and the cams, the lobes of the cams can be seen with the inner base (lower part) of the lobes on the buckets

First the exhausts, the feeler gauge goes between the bucket and the cam lobe

.008 thou all good

When the inlets were checked I couldn’t get my smallest feeler gauge in that being .0015 thou, spec is around .004 from memory. FAIL!!!!
Head off
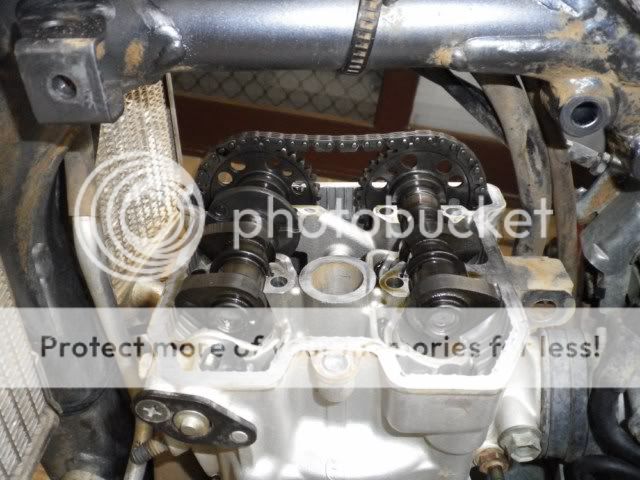
The cams need to be removed, this means the cam chain needs to be removed as well. The cylinder head bolts are under the cams on the cam chain side. Before you remove the cams and chain you need to release the tensioner for the cam chain. This one was fitted with an aftermarket manual adjuster. In the picture below you can see where the adjuster was removed from above the black hose

Cams and retainers

All the bolts loosened ready

Cam retainers / bosses removed

You need to not drop the chain down into the engine, so I use a cable tie to hold it up on the lower drive gear ready to go

Cams out chain held up


The two 10mm headed bolts on the timing chain side of the cylinder head need to be removed now see just to the right of my thumb in the below picture

Next the 4 main head bolts, the old manual decompression pin not used stops you getting a socket on it so it had to be removed. See in the picture below, bottom left side of the picture you can see the head bolt and the pin stopping the socket going on square


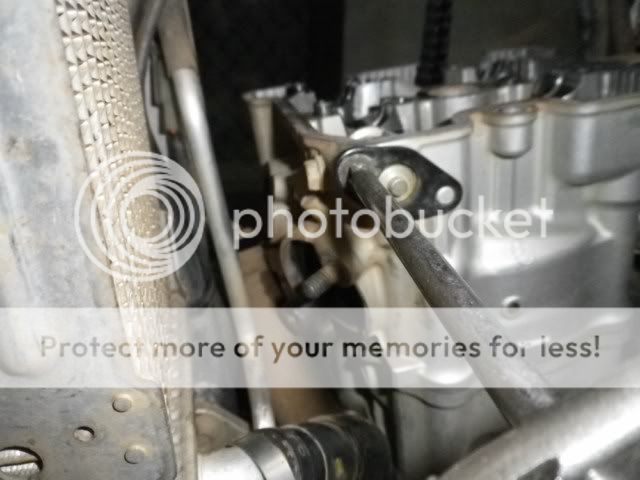
The pin needs to be removed, but of course the screw is a soft as a two stroke rider. I didn’t have an impact driver, so I used the below setup, turning the screw slowly while hitting the end of the screw driver, came straight out happy days


Finally there is a 10mm headed bolt that goes in and retains the pin, it goes in from the front of the head

The 4 main bolts can then are undone evenly, use a single hex socket you don’t want to round a bolt down in the head (6 sided socket)


The head is then removed from the mounting dowels be careful don’t go sticking screw drivers between the head and barrel because you will mark the sealing surfaces


Now the head is lifted off, first the cable tie is cut while I held the chain up. Once removed the chain is then tied up again


Inspection when the head is off
http://www.youtube.com/watch?v=WK9hRncjT7A
Later the head inspected when I get it to Nick at Teknik’s
cont.
April 29, 2011 at 12:21 am #200302That was a good DIY for us DRZ owners TB!
Krusty, you’ll be able to remove your head now in November after riding in the Cameron Corner dust full noise for a week !!

 :laugh: :pinch:
Nick
April 29, 2011 at 12:48 am #200303TB or Fish
How many k’s has the DRZ done? And Fish how often did you check the valve clearances?
I’m wanting to know if the maintenance schedule in the manual is sufficient, although I only recently re shimmed and that was at 18000 km.
Adam.
April 29, 2011 at 1:03 am #200315Around 15000 kms Adam I was told. It has been dusted before he bought it I reckon
TB
April 29, 2011 at 1:10 am #200304TB
Your probably correct there as mine were only at the lower end of in spec when I re shimmed

I guess I’ll keep up what i’ve been doing and it will probably out last me :laugh: :laugh:


Adam.
April 29, 2011 at 2:14 am #200305Adam,I think the bike was dusted before fish bought it, It had the original airfilter and fish replaced that with a unifilter but the damage was done!!
Mine has done 18000 and is still in spec. After talking to Krusty a few year models seem to have valve prob’s and other year models dont!! But a good duel airfilter well oiled and greesed is good insurance IMO.
Nice work TB, this will help when mine needs stipping in the future!!:huh:April 29, 2011 at 3:06 am #200322I did some investigation into the head casting early model theory today Boulder because Krusty had mentioned it after talking with a bloke that knows his stuff and does a lot of head work. Problem is it is supposed to be a casting coolant flow problem that causes the valve to wear, well that doesn’t make sense? The valve face and seat wears and thats the area that dust attacks. If it was a coolant related problem it was pointed out it would be valve stem wear because the greatest coolant heat transfer would be there. As also pointed out the cylinder casting hasn’t changed since the engine first came out which is why the manual decompression actuator is still in the head as shown in my pictures from pre 2000 maybe even 350 days
( remember me pulling that out to get onto the head bolt in the photos ) Also explained today when a DR head is flow checked more air passes through the left hand intake valve then the right hand side one. Guess which is the common valve that closes on a DR if it gets dust through it?I think it’s all dust related :dry: that said I want to talk with a guy on the central coast that knows his way around these and I can’t speak with him until Monday.
More later :laugh:
TB
April 29, 2011 at 3:20 am #200306Awesome stuff TB… I look forward to the findings of the research… I’m pretty sure mine was dusted as the housing between the air filter box and carby was full of dirt, actually caked on the walls from the what the mechanic said…
From memory I think it was years 2002-2004 maybe to 2005 that supposedly had this deficiency..
Great stuff..
 April 29, 2011 at 8:35 am #200324
I know Boulder and fish run unifilters but I was wondering what others have in their Drz and if their is a link to dusting their ?
I have 2 twin air filter which I rotate every ride. I had the valves checked at 9000km and all was good.
Nick
April 29, 2011 at 11:08 am #200326Nickj wrote:I know Boulder and fish run unifilters but I was wondering what others have in their Drz and if their is a link to dusting their ?I have 2 twin air filter which I rotate every ride. I had the valves checked at 9000km and all was good.
Nick
I run a unifilter as well. When I clean the filters, even after a dusty ride, the inner filter is as clean as the day it was first put in
 I have yet to see any dirt on it
Mine is a 2000 model so hopefully before the head problem being refered to :dry:
Good work TB I’m sure it will help many a nervous DRZ owner have the confidence to tackle a head job


I’m looking forward to the reassembly :ohmy:
PS how is the barrel for wear?
Adam
April 29, 2011 at 12:33 pm #200327Nickj wrote:I know Boulder and fish run unifilters but I was wondering what others have in their Drz and if their is a link to dusting their ?I have 2 twin air filter which I rotate every ride. I had the valves checked at 9000km and all was good.
Nick
I used to run dual twin airs as you mention but after camerons and seeing boulders uni-airfilter setup and after ride photos of his filters I started using Uni shortly after.. cheap insurance..
April 29, 2011 at 12:41 pm #200307There,,, You did the job I should have done when I did the valve shimming on the KLX:whistle:
Nice easy to follow instructions ,pic by pic, any mug can do it really (as I found out myself):laugh:
April 29, 2011 at 9:17 pm #200331Ok TB my stupid question for the day. Apart from the bike not wanting to start cold, is there anything else that would cause me to have to go through all this to check the clearances. Or put another way, if I have no problems starting I take it I should just leave the clearances alone and not worry?
April 29, 2011 at 9:34 pm #200345Snow you dont have to go through all that to check the valves :blink:
To check the valves you only have to get to the take the tapper cover off stage and set the engine up on TDC. Check the clearances like in the pictures, if they need doing well that’s for another video maybe one day
It pays to keep an eye on the clearances before it gets to this stage, it is part of the recommended scheduled servicing for all matesk
TB
April 29, 2011 at 10:45 pm #200346snowy09 wrote:Ok TB my stupid question for the day. Apart from the bike not wanting to start cold, is there anything else that would cause me to have to go through all this to check the clearances. Or put another way, if I have no problems starting I take it I should just leave the clearances alone and not worry?Look here Snowy… http://www.obtrailriders.com/index.php?option=com_kunena&func=view&catid=72&id=92957&Itemid=75
Jsut ignore my ugly mug :laugh: :laugh:
-
AuthorPosts
You must be logged in to reply to this topic.