This topic contains 12 replies, has 0 voices, and was last updated by Mick D 15 years, 6 months ago.
-
AuthorPosts
-
September 14, 2010 at 9:17 am #98950
Righto, Head stem bearings are one of the most neglected bearings on a bike (2nd to linkage bearings).
It is a bit of a bitch of a job. So it is always put off for another day.(those days are often too far in between).
A lot of us don’t do it all that often, so a thread dealing with the issue would be handy to refer back too.
I will throw the first question up to be answered.
Is there a tool or a technique that can be used to easily remove the bottom bearing and old seal of the head stem.
Feel free to throw up your thoughts.
Cheers
MickSeptember 14, 2010 at 9:34 am #187396Mick I use two fine tipped flat screw drivers, one from each side (180 degrees from each other) Once it starts to move up I switch to a little each side with a chisel between the bearing lower clamp. When its up enough I lever it a touch each side.
The other way I do them is to remove the gage and rollers and use the top lip (closest to the threaded end of the stem) with a drift against it and belt it side to side
180 degrees apartObviously the best way is break the gage of and fit a bearing press plate and press it off.
(never hit a bearing with a hammer as two hardened surfaces hit together on will shatter, very dangerous)
(I have never had to replace steering head bearings on any of my bikes even high milage bikes. I think its because I grease them with quality water proof grease regularly (every year). Never pressure wash that area directly. Normally water gets in, the bike sits for a week or two, a rust mark sets in the cup and that breaks up and the bearing fails.
FAIL TO PREPARE, PREPARE TO FAIL its the only thing I can put it down to.)
TB
September 14, 2010 at 9:49 am #187398I found a really easy way to remove them Mick, while the bike was having the suspension done I had them change the bearings as well, dead easy.
 .
.I got them to check the swing arm bearings as well and they only needed a bit of grease probably because there are grease nipple for them ones that get an occasional squirt.
September 14, 2010 at 10:10 am #187399I was kinda hoping that there was a tool similar to a ball joint fork to belt them off.
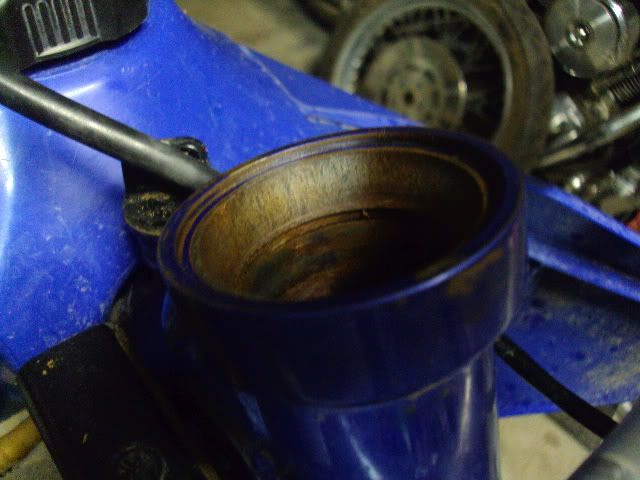
September 14, 2010 at 10:10 am #187400I did mine last week and when I first removed the steerer it looked like the lower race was shagged. I gave it a good go with some brake cleaner and then smothered it in blue grease. After a few revolutions it started to free up and is now super smooth. The top race was fine and just needed a re grease.
STM
September 14, 2010 at 10:14 am #187404I have a YZ250F in my shed that I have the front end out off ( a friend has just bought it). The bearings and cones are beyond saving. :S He has bought it to me for a tidy up.
September 14, 2010 at 10:35 am #187405I have used the first method you mentioned before TB. I thought when I was doing it, “there has to be an easier way”.
The bearings on the YZ are pretty neglected.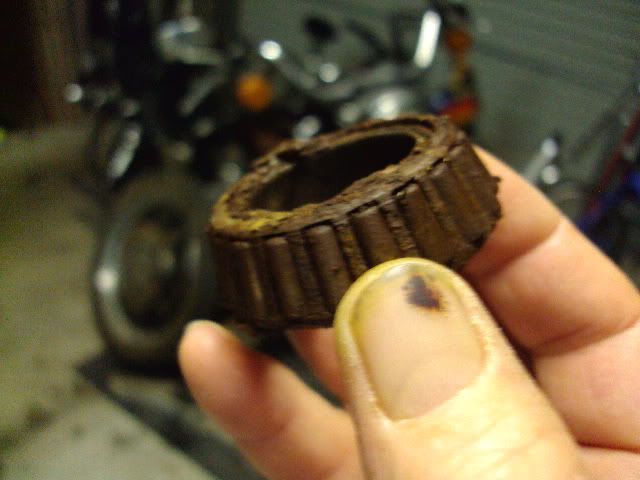
So are the cones.
 September 14, 2010 at 12:17 pm #187407
Mick this is the way that I have had most success with
")
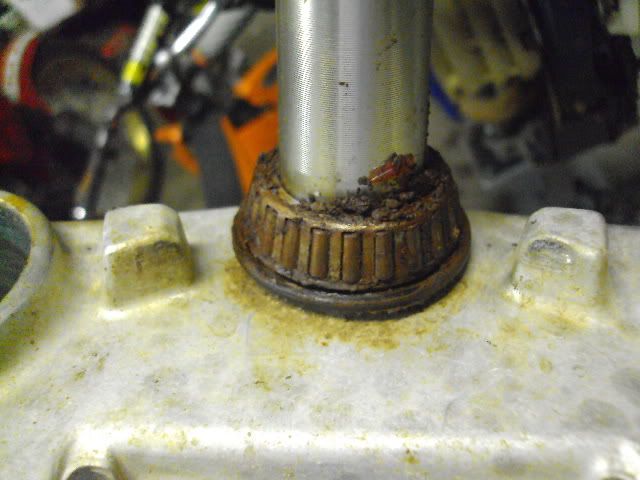
First I cut the outer bearing cage then removed all the needle rollers. Then I dropped the lower clamp and stem in the freezer for the night.
The next morning use a small propane torch and warm the bearing cone up just a bit, the good news here is since the whole assembly is cold the stem underneath the bearing begins to cool back off.(law of thermodynamics – heat travels to cold) The bearing is warmer than the stem, I just took a flat blade screw driver or small fox wedge and a hammer and tapped on the inner race until it pops off.Take your time It may take a few cycles of heating and beating to get the bearing off. The lower clamp isn’t damaged and it’s all ready for the new seal and bearing.
Now time to press fit the new one, I found a similar process for that job that involves the freezer as well. It’s actually where I got the idea for the removal.
Ultimately the best way is to use a press and remove the stem but this has worked great. The Yamaha’s carry their oil in the front down tube and tends to heat and melt the grease out,that is why they do really need to be checked often on the blue machines
")
Ollie
September 14, 2010 at 7:46 pm #187413Good one Ollie, I have used the freezer method to do shackle pins and bushes on truck springs in the past. Your missus must hate you. :laugh: If it isn’t bearings in the freezer,you’ve got an exhaust pipe in there. :laugh:
September 14, 2010 at 8:33 pm #187414Ollie wrote:
Quote:The Yamaha’s carry their oil in the front down tube and tends to heat and melt the grease out,that is why they do really need to be checked often on the blue machines
Ollie
Thats a good point Ollie
as do XR’s, DR’s even my Tenere. I haven’t have had it meld but the grease I use does cost someone a small fortune :laugh: Good grease and regular maintance.TB
September 15, 2010 at 8:41 pm #187415I ended up reshaping the point on an old cold chisel and flogged the bearing off with that. Once I got it to move initially, it was relatively easy to get it off then. The whole job took me just on an hour to do, removal right through to back together. I took a bit of Ollie’s advise and I put the bearing cones in the freezer for a little while so as to make it easier to knock them in. Worked a treat too.
September 15, 2010 at 8:57 pm #187451Good job Mick
Thats one task I have never done but looking at those bearings you removed, I probably should have a bo-peep.
What year model bike were you working on??
Cheers
MurphSeptember 15, 2010 at 9:41 pm #187452It is a 2001 model, previously owned by a mechanic, hence the lack of maintainence :laugh:
-
AuthorPosts
You must be logged in to reply to this topic.