Home › Forums › Motard Forum › Motard Fourm › Project Motard DRZ400
This topic contains 206 replies, has 0 voices, and was last updated by Anonymous 16 years, 3 months ago.
-
AuthorPosts
-
November 14, 2009 at 5:33 am #161023Done finished and roadtested

TB & Dan
November 14, 2009 at 5:38 am #161037And when can we anticipate the unveiling? :woohoo:
November 14, 2009 at 6:33 am #161038
AnonymousWell it is all done now and as TB has mentioned it has been road tested.
The biggest thank you for this whole project has to go to Mal and Chris from Sutto’s Motorcycles. Without their support I would not have been able to achieve as much as I have with this project. Thank you so much guys!!
There were a couple of glitches with the whole project which resulted in me having to do a bit of running around to find some stuff but it all worked out OK.
")
I don’t have all the details of what was actually done because between running around, watching the kids (Salina was a big help here – Thank you Salina you were a great help
) and sitting around listening to TB and DanD slinging shit at me. I can tell you what was put on it though.Pro Taper Fat Bars – high bend (which DanD and TB didn’t entirely agree with because they don’t look as poo as the low bend)
Domino hand grips
Blue blingy barkbuster bar ends
Motard front guard
Blingy 17 inch wheels with gold talon hubs
All guards with sticker kit from Tee ‘n’ Cee (thanks Craig )
Manual Cam Change Adjuster (thanks Boulder )
Roc Stomper fuel cap
Powermadd hand guards
Yellow Goodridge braided brake line
Rear LED blinkers
Blingy front blinkers
DRC LED taillight
The gearing was changed to 15/41
The stand was shortened
Hand polished fabricated front blinker mounts (great job Eagle Thanks )
Polished alloy bashplate mounted catch tank for carburetor and coolant overflows – great idea TB (Thanks BigT for the fabrication )
TB adjusted suspension and compression dampeningThanks Wikd for all your stuff that you gave me but the wheel spacers didn’t fit and we’ll put the brake pins in another time. I will give you back the wheel spacers just in case you need them.
Now that’s what was done but it wouldn’t have all happened without the tremendous efforts of TB and DanD. They worked for hours on it last night (and they did do more than put the fuel cap on) and started early again this morning and worked right through until around 3pm. They only stopped to quickly woolf down their lunch. I have to thank Eagle today for all of his efforts and TB can fill you in on what he was able to do for us.
As I mentioned before Salina was a real great help with watching the kids, getting my clothes off the line, carrying everything for me, getting slime out of Emma’s hair for me which nearly resulted in Emma getting a crew cut and offering to help out with everything.
DanD and TB were both very patient with me, especially in regards to the handlebar selection. It was painful but I needed to make sure that they were right.
As for the test ride I didn’t take it out for too long because it didn’t have much fuel and apparently you need to be an Engineer to get the Rock Stomper fuel cap on.
The bike actually handles completely different to a dirt bike and a road bike so I have to keep working on getting more confidence on it. It turns very differently so I was taking it very easy. I will take it out again tomorrow to get more used to it.
Overall I am extremely happy with it. I don’t think I can actually express how grateful I am to everyone who was involved in this project.
THANKYOU EVERYONE (Happy shouting)
I also can’t tell you how good a weekend it is shaping up to be because the kids are all having an absolute ball. Keiran and Lachlan are the exact same age as my girls and they all have so much fun together.
November 14, 2009 at 7:10 am #161043
Anonymous
I thought I would do a separate post to thank Sutto’s because they were the ones who financially supported this project most (other than me and DanD of course). However if you factor in TB’s and DanD’s hours that they spent over the whole project (from the organising to the end result) and their hourly rate it would also be up there. TB did a lot of work for me and I can honestly say that if he didn’t keep at me about the project then it might not have got done.
Anyway back to Sutto’s the service and support that they gave me was phenomenal. Because of TB’s relationship I was able to get a heap of stuff to try for the DR and then whatever I use I just then need to pay for (which I will do next week). Anything that I didn’t need I will just send back. You can’t get better support than that.
As a thank you to Sutto’s I plastered their name on most of my plastics. I was happy to do that regardless of what they were able to do for me on this project because they really do support us Old Bull’s in general.
Mal was excellent to deal with and couldn’t do enough for me. He also knew his stuff and what I ended up getting from them was more than I asked because he knew all the stuff that I would probably want so he just got all of that for me as well and I am very grateful for it.
Thanks Suttos!
November 14, 2009 at 7:13 am #161044
AnonymousBTW I also wanted to mention a thanks to Inskip Motorcycles. We were in a bit of a pickle today because we needed something and although they didn’t have what I needed, they got me the part number that I needed and even checked with a rival motorcycle store to see if they had what I needed. We always get great service from Inskips and anyone will tell you that this guarantees repeat business.
November 14, 2009 at 7:49 am #152512
Glad you are happy with the result KD")
It sure is a nice thing, and it was a pleasure to be invited to participate in todays proceedings :laugh:
I didn`t do too much really, but it was still fun to be a part of it all!!!!Thanx Salina as well for watching over the tin lids in the pool etc “GREAT JOB”
Also thanx for the sausage sangas etc
I have a couple of pics to upload & a short vid of the maiden voyage, I will get em on tonite.I did some of my own bike time this arvo, cleaning after last weeks ride & fitting some other gear, but thats for another thread
Cheers for NOW
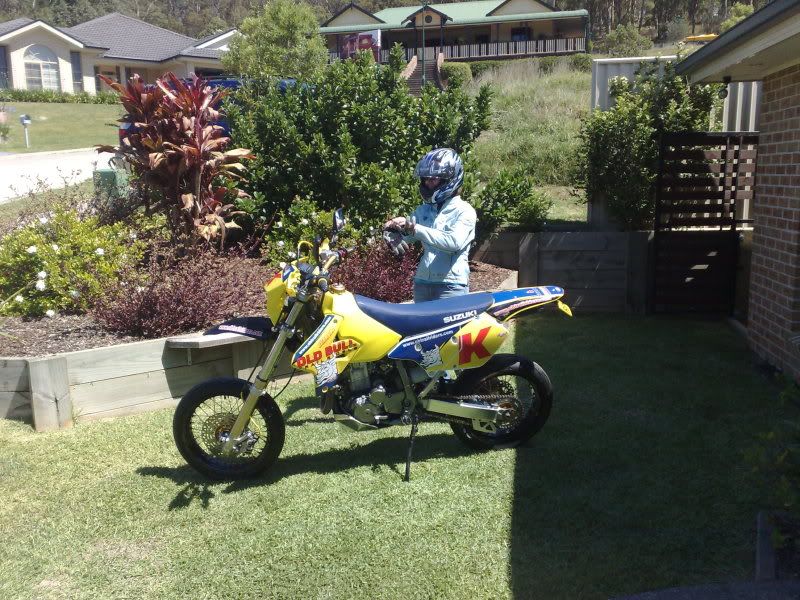
November 14, 2009 at 8:05 am #161045How phat does that look!!!!!!Let’s get some photos of it up on a stand, so we can fully appreciate its beauty.
November 14, 2009 at 8:07 am #161048micknmeld wrote:
Quote:How phat does that look!!!!!!Let’s get some photos of it up on a stand, so we can fully appreciate its beauty.My pics & a vid
 November 14, 2009 at 8:23 am #161049
welcome to the DRZ club young lady..looks sweet/phat/narly and what ever else they say..well done to the build team, and all the businesses that assisted….
November 14, 2009 at 8:39 am #161052
AnonymousProject Motard DRZ.
Well we have now finished the project DRZ.
First of all a massive thankyou to Sutto’s Motorcycle Supplies at Penrith. Without your continued support this project wouldn’t have been as easy.
Sutto’s is your one stop shop for all your biking needs. Mal and Chris have been fantastic from start to finish. Also everyone check out the bike stand bulk buy, we were lucky enough to have one for the weekend (thanks to Jeffro) and they are the absolutely the best when yiu are working on your bike.Craig from Tee-n-Cee done all the graphics and which he done a fantastic job on.
Eagle was a part of the build up as well – he was in the fabrication shop in the shed this morning making blinker perches and shortening the stand. He also done some life guarding duties watching the little ones in the pool.
Salina you are a beautiful person. Your supporting role in project DRZ Motard has been excellent. You looked after the little ones all day and even gave up visiting friends to help see the project through to completion.
Boulder – your contribution of the manual cam chain tensioner, will ensure Kylie has MANY years of trouble fee riding. (Note Kylie I said MANY years) Thanks mate.
WikdBeemer – While the parts that you supplied haven’t been fitted yet, they will be and I thankyou for your contribution.
KylieD – You have nearly succeeded to totally doing my head in with bikes. But this is a project that you have been very passionate about and have put a lot of leg work in to help make it happen. Now it’s finished go and ride the bloody thing. Enjoy yourself on it and ride carefully.
TB – my main man, you also have been very passionate about this project and as soon as the notion was floated about doing a motard you where first to say you wanted to be a part of it. You have gone well and truly above and beyond. You organised the transport for the wheels from the west coast of Australia to the east. Your numerous trips to Sutto’s working out the finer details for the project. Carting the plastics down to Tee-n-Cee to get them done. Bringing everything back to our place for the fit-up. Being here to help me out with the build up of the bike. Lending me your fiddy in motard trim so me and Kylie can go out for a motard ride in the up coming weeks. You have done so much for this project and for both me and Kylie. Mate you are one of the worlds assets to humanity. Your passion for bikes and OBT is commendable.
So whats it like to ride.
I took it for a small blat this arvo after Kylie had returned from the maiden voyage. It hasn’t got the power and torque of TB’s fiddy, but still is very nice to ride. A bit more ride time is in order to make an informed decision but from the small blat that I had I am sure that it will pan out to be super good. I tried for a wheelie up the driveway but I think that it is a bike that is more for speed than power. Given that it is geared so high. TB’s fiddy wheelied a whole lot easier up my driveway but it is a bike that has massive amounts of torque to do it even with fast gearing.
The DRZ motard looks very horn and Kylie looks super hot riding it.
However I am glad that it is finished. I have enjoyed the time in the shed with everyone that has helped with the build up.I am now going to lubricate my throat with another well earned Vitamin B or Bundy or both – whatever.
November 14, 2009 at 8:40 am #161054Wow what a busy 24hrs, I picked up the parts from Sutto’s cheers Mal and Chris Sutto
Salina the boys and I travelled up to the D’s Friday arvo, Dan and I finished on my bike fitting the blinkers etc thus making it completely road legal for Dan to use whilst I am out of action.We then decided to commence project DR as had nothing to do and it was only 8.30 I said to Dan shouldn’t we tell Kylie, a well lubricated Dan said “lets get a bit done and surprise her” We fitted the bar raisers and the low bend bars being that it is a motard bike and all. I then went and asked Kylie if she could come and pick out the grips she wanted to use, either the blue and yellow or the yellow and black. What seemed like 2hrs later :angry: we got the go ahead to fit the high bars and the yellow and black grips (oh my god no wonder Dan drinks) We fitted the front guard, easy job, Dan did it by himself.
It was then discovered problem one, the hand guard mounting kit was the wrong one. Dan needed more inner lubrication and we started on the blinkers, I mounted one of the rear blinkers and Dan the other, we couldn’t get the blinkers to work correctly and we found the battery was flat. (Again more inner lube required by Dan)
We fitted the yellow goodridge brake hose which looked the goods.
We then got the hacksaw and cut the back of the sub frame which made us feell heaps better :woohoo:
We then fitted the fuel cap, big job that :laugh:
We then started thinking about the blinkers and we couldn’t find the battery charger which it was decided was at Dan’s dads place it was very late so we sat down in the shed and had some after work drinks and the shed was closed at 1.30amToday dawned and we started early, this required we go and get the battery charger and get Apu to fill the gas bottle at the Kwiky Mart. We then cruised supercheap auto where Mick rang us crying about his blinkers and then telling me how his auto electrician had fixed them with a special flasher can (tip here people get the ones Kylie got as they don’t require any special resistors or flasher cans and are nice and bright)
We returned to the shed and Beagle was there, he was put onto making the front blinker mounts which he did a great job off.
Dan and I mounted the rear guard and tail light assembly which I found a touch nervous because it required us drilling holes in the rear guard through the sticker but it turned out beautiful") I wired it and tested OK
I wired it and tested OK
Beags and I fitted the new hand guards, nice
Dan made a new aluminium plate barrel holder for the ignition which was a work of art. Beagle completed the blinker mounts but in typical Beagle fashion he then left halfway though only to return with his kids :laugh: He then started work on shortening the side stand, I completed all the wiring and fitted the radiator deflectors, side plates, shrouds fuel tank etc.
Dan and I rerouted the 4 over flow hoses to the air box and the remaining two and the coolant over flow got lengthened and fitted into the bling polished alloy catch bottle on the front of the bash plate what a great idea I had with that even if I say so myself
I bleed the front brake with Beags keeping an eye on the reservoir level for me.
We fitted the new front sprocket but the case saver was fouling on the chain because of the rear sprocket sized front sprocket we had fitted so Dan was given the job of fixing that :laugh:
The bike was started and all the electricals tested okChain was adjusted, return springs fitted to the brake lever, everything was cable tied and checked. The stand was painted and fitted now shorter. The bike was wheeled out for photos and Kylie took it for a run.
I really enjoyed the project, thanks to Mal at Sutto’s for all the extra help he put into this project, cheers mate
Thanks to Salina, babe you put up with so much thanks
Kylie for letting me help
Dan you the man
Beagle thanks for your help also
Last night and the fuel cap from hell

Rear blinker

Front guard


Rear guard

Getting there


Guard and exhaust


Front brake and the yellow Goodridge braided line

Catch tank (you can see the brass drain bung in the bottom)

Catch tank


Hoses running down the catch tank

Hoses up at the air box inlet

Getting there now

Manual cam chain adjuster (Supplied by Boulder)

Hand guards

Flight deck

Front blinker and mount

Waiting for Kylie to return with the correct hand guard mounting kit
Thanks Sutto’s
TB
November 14, 2009 at 9:11 pm #161055
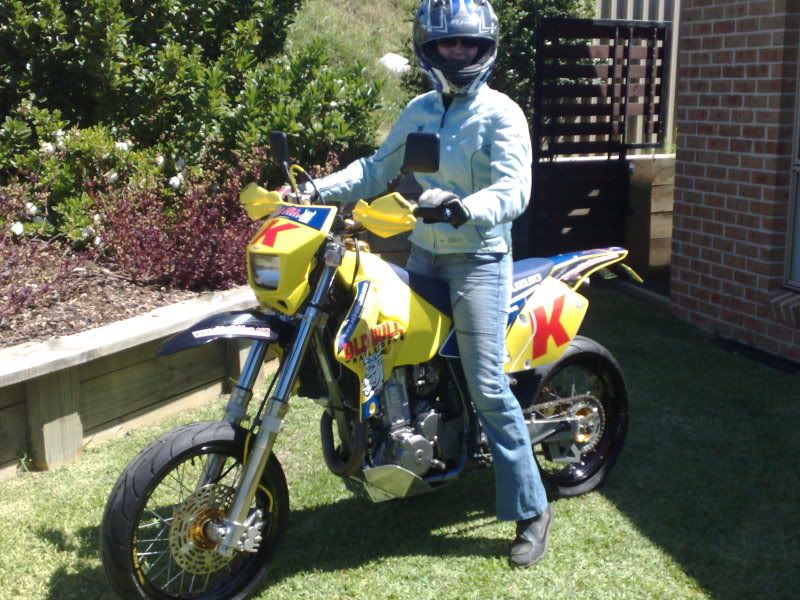
AnonymousWe had a bit of a discussion this morning and decided that we are going to replace the front guard with a yellow one. We got the black motard guard with the wheels and thought it would look OK but it sort of just fades away the front of the bike. So I am going to replace it with a yellow one.
November 14, 2009 at 9:12 pm #161024Well another beautiful day dawned here, Kylie is talking about taking the DR out already :laugh:
Bacon eggs cooking, someone washed my car overnight
so has anybody else got a bike they what builtTB
November 14, 2009 at 9:19 pm #161072KylieD wrote:
Quote:We had a bit of a discussion this morning and decided that we are going to replace the front guard with a yellow one. We got the black motard guard with the wheels and thought it would look OK but it sort of just fades away the front of the bike. So I am going to replace it with a yellow one.Will you be using fork socks???
good call on the black guard
November 14, 2009 at 9:32 pm #152513Yes,
The black guard is somewhat disguised on the front end & draws attantion to the headlightGood call on going to yellow guard, should look the goods then
-
AuthorPosts
You must be logged in to reply to this topic.